
".extra-menu { background-color: #f3f3f3; padding: 20px; } .extra-menu .extra-menu-h { height: 36px; } .extra-menu .extra-menu-h h3 { display:inline-block; } .extra-menu ul a{ text-decoration: none; } .extra-menu .menu-child { text-indent: 4em; } .extra-menu .menu-child:before { left: 4em; } .extra-menu .extra-menu-h h3 { line-height: 36px; } .collapse-toggle { float: right; cursor: pointer; user-select: none; display: inline-flex; align-items: center; font-size: 14px; } .collapse-toggle img { width: 30%; transform: rotate(180deg); } .collapse-content { margin-bottom: 0px !important; margin-top: 20px !important; overflow: hidden; max-height: 0; transition: max-height 0.3s ease-out; } .collapse-content.expanded { max-height: 1000px; /\* 设置一个足够大的值,确保内容可以完全展开 \*/ } .ph-id { position: relative; top: -90px; } jQuery(document).ready(function( $ ) { $('.collapse-toggle').on('click',function(){ var content = document.querySelector('.collapse-content'); content.classList.toggle('expanded'); if (content.classList.contains('expanded')) { $(this).find('div').text('收起'); $(this).find('img').css('transform','rotate(180deg)'); } else { $(this).find('div').text('展开'); $(this).find('img').css('transform','rotate(0deg)'); } }) })
Hostinger是一家[美国主机](https://www.idcspy.com/)商,凭借着低廉的价格受到很多站长的欢迎。很多站长使用的时候会问Hostinger主机怎样安装WordPress,下面主机侦探就教大家具体操作方法。
Hostinger主机有WordPress一键安装包,需要我们注意的是,我们必须先关联并激活域名,才能设置WordPress。
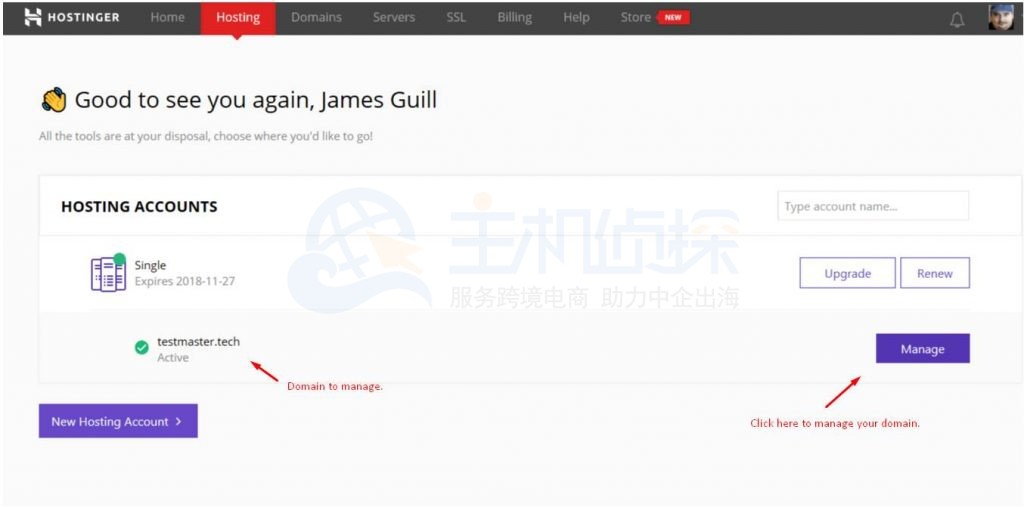
一、我们需要登录[Hostinger](/#)账户并点击页面顶端的“Hosting”,这里会列出域名,点击域名旁边的“管理”按钮即可。
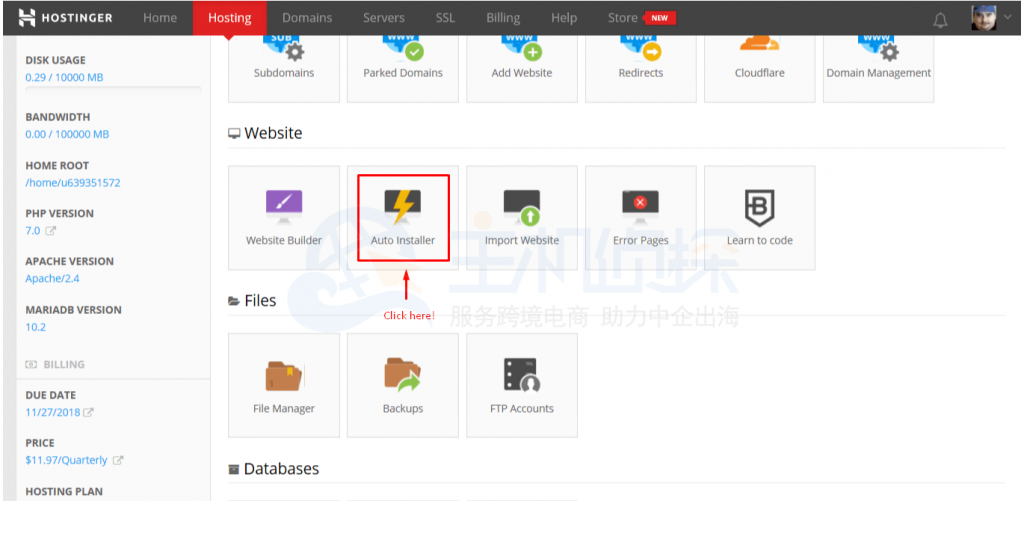
二、在“Website”中找到“Auto Installer”并点击。
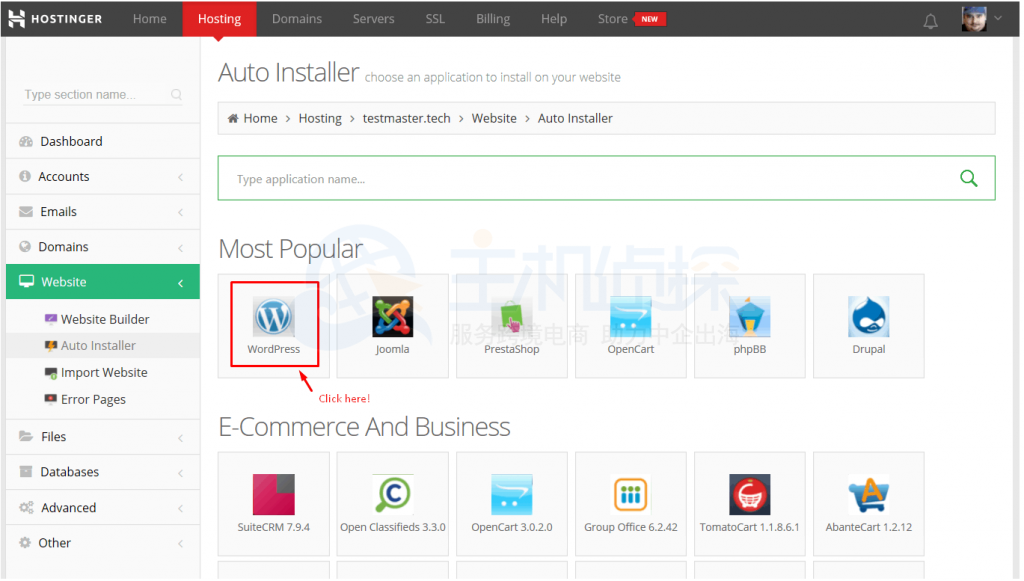
三、在“Most Popular”中点击WordPress进行安装就可以了。
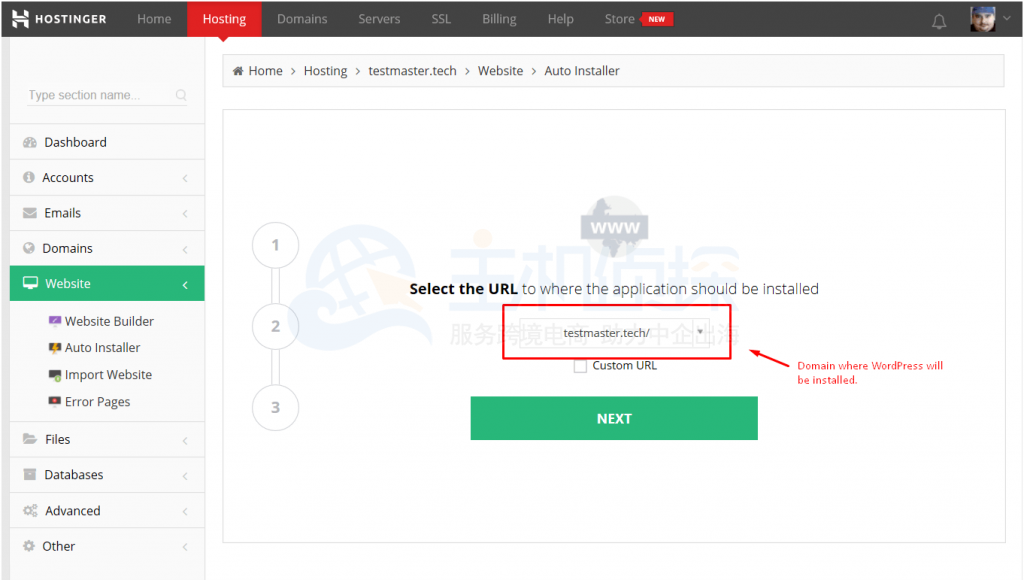
四、选择WordPress安装到哪个URL,你的域名应该已经默认列出。如果没有,点击下拉框并选择域名。然后,点击“NEXT”按钮。
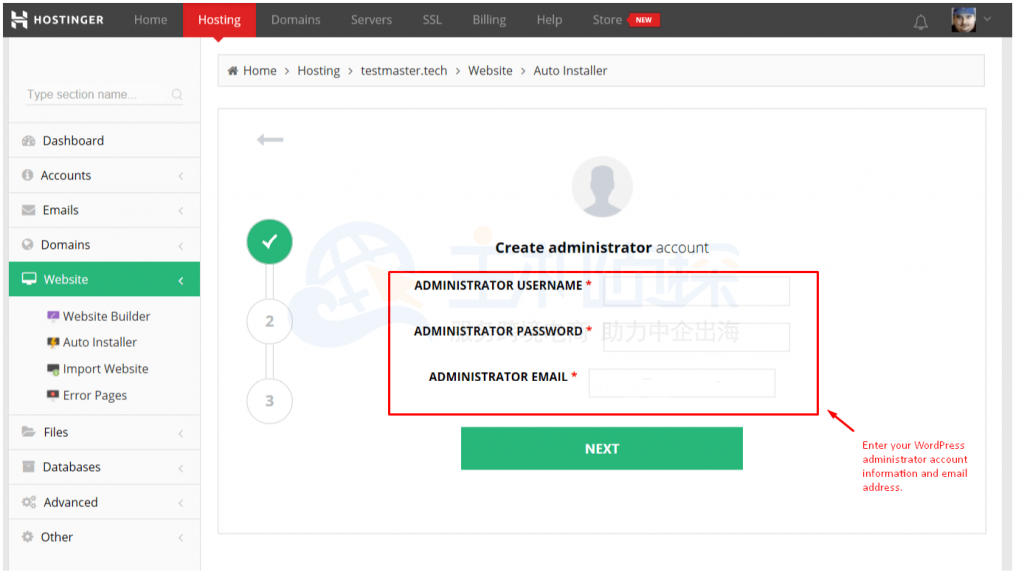
五、创建管理员用户名、密码并输入管理员邮箱。
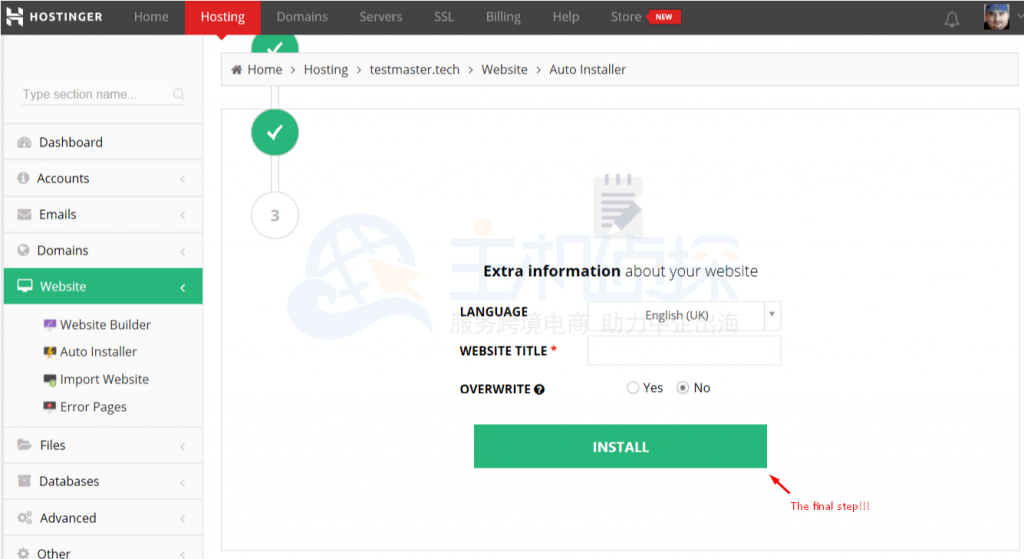
六、输入网站的语言,默认是英语,如果你想更改语言,点击下拉菜单。然后,输入网站名称。你可以为“覆盖”选择“否”,点击“安装”开始安装WordPress。
七、安装完成之后会有提示,就成功安装完成了。
以上就是Hostinger主机安装WordPress的具体操作步骤,总体来说还是很简单的,需要的用户只需要按照上面操作步骤进行就可以了。
阅读推荐:
《[Hostinger WordPress主机租用介绍](/#)》"
松果号 作者:松果号原创文章,如若转载,请注明出处:https://www.6480i.com/archives/107312.html